On this page
- What the app does
- Architecture decisions
- State management: Riverpod 3 with code generation
- HTTP client: Dio with self-signed SSL bypass
- Data models: freezed + json_serializable
- Task 1: Set up the Flutter project
- Task 2: Build the Proxmox API client
- Task 3: Build the dashboard screen
- Key design decisions and gotchas
- Running the Linux build
The Proxmox web UI is capable, but it’s browser-only, slow to load, and greets you with a certificate warning every time you reach it from a fresh browser. After using it daily for six months, those small frictions added up, and I decided to build what I actually wanted: a dedicated native app that sits in the taskbar, auto-refreshes every 30 seconds, and could eventually run on iOS too. Flutter made that practical — one codebase that compiles to a native Linux desktop binary today and an iPhone app later, with no web rendering layer in between.
This post walks through the architecture and the key decisions behind MyOfficeLab (since renamed HomeLab, which is what you’ll see in the screenshots), a Flutter app targeting Linux desktop (current) and iOS (planned). It’s part build log, part reference — if you’re considering a native front end for your own lab, the gotchas near the end are the parts I wish someone had written down for me.
What the app does
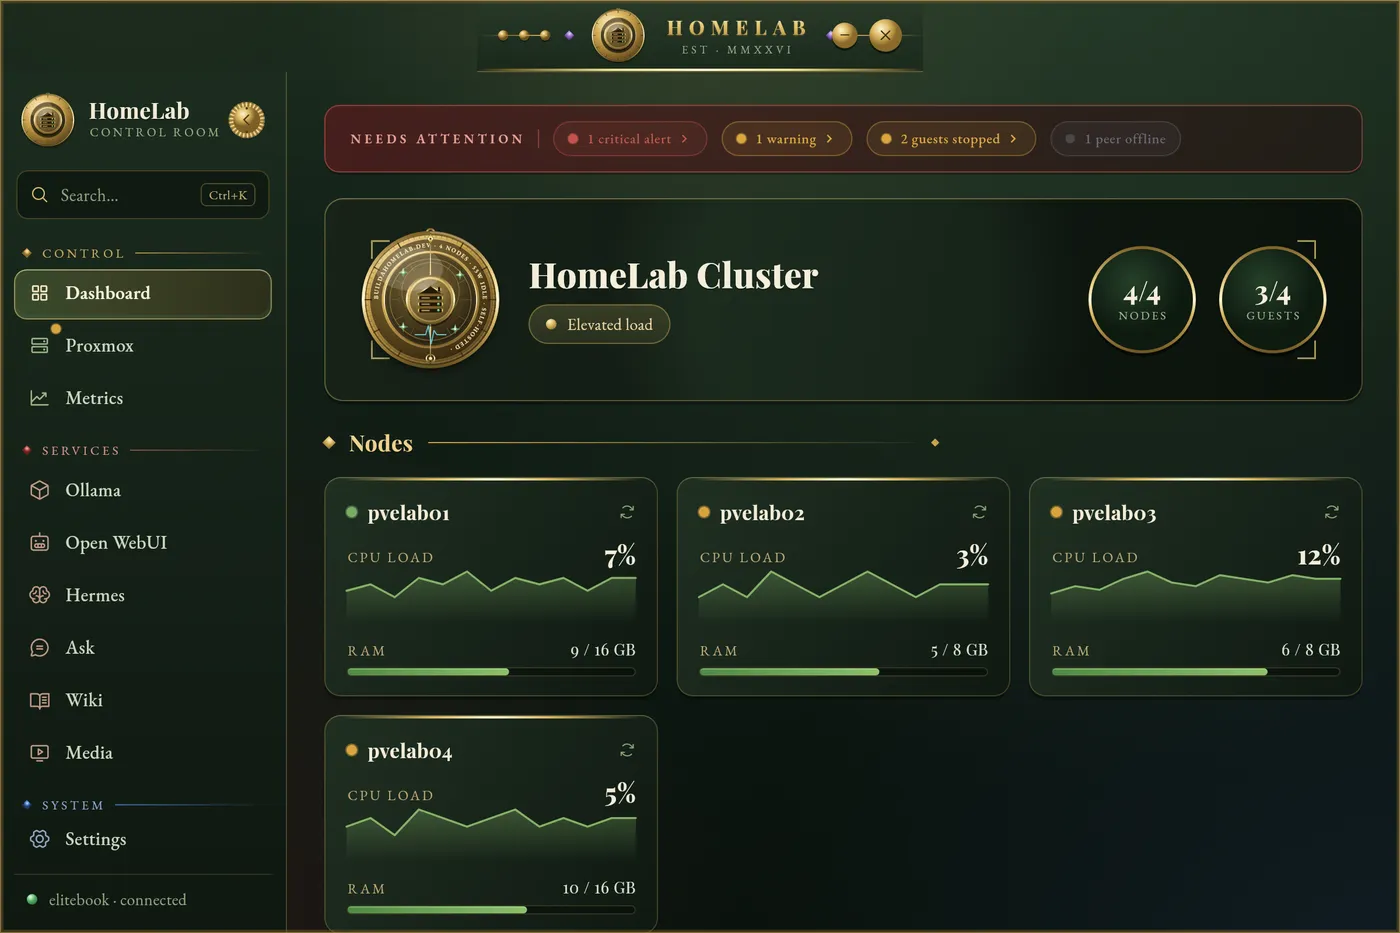
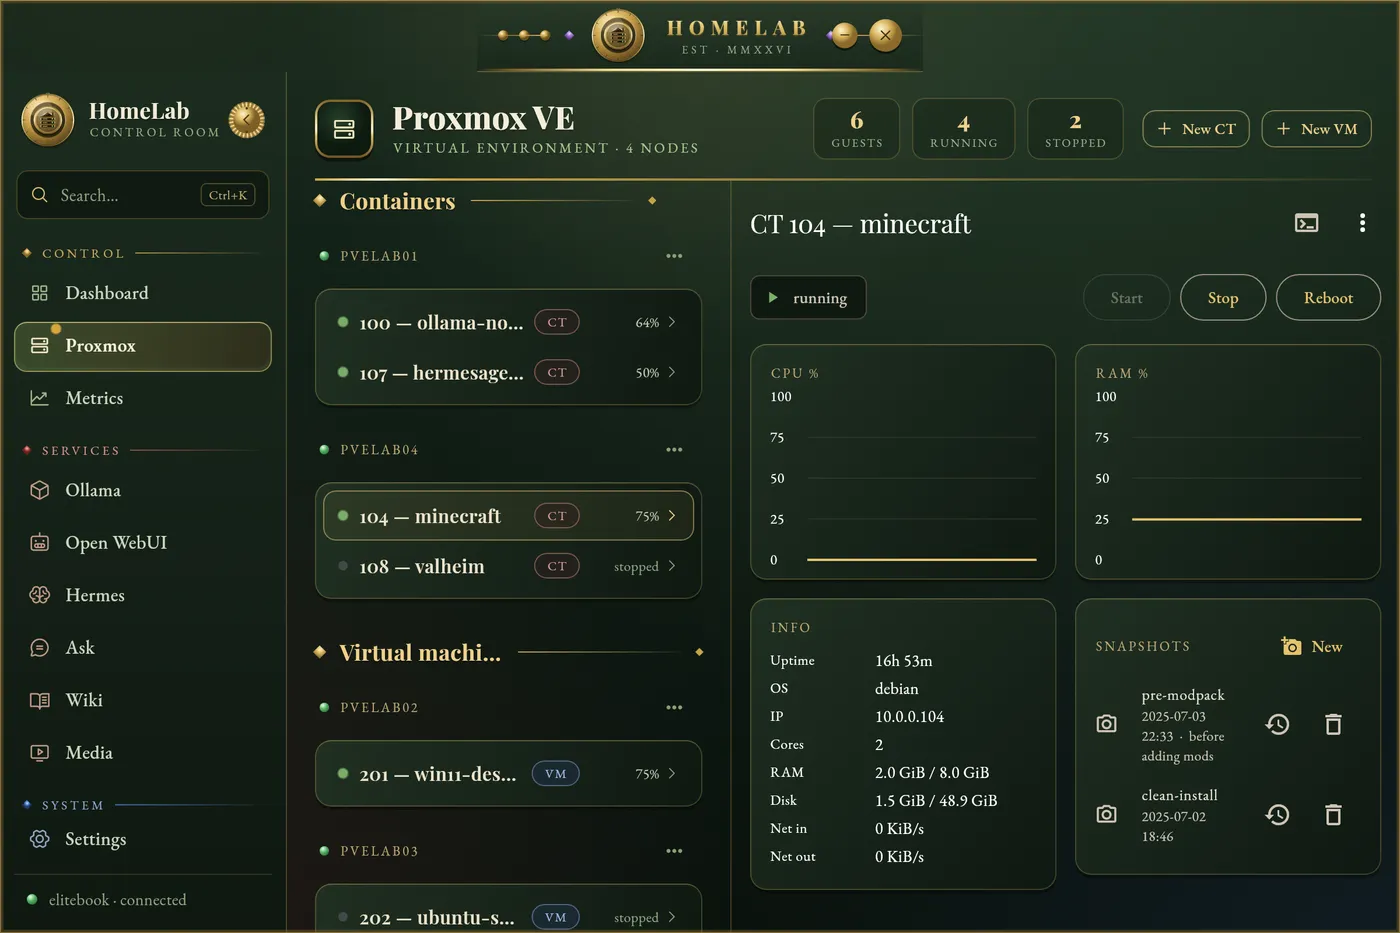
Twelve tabs in the rail now: Dashboard, Proxmox (node/CT list + lifecycle ops), Metrics (cluster + AI telemetry and a what-if capacity planner), Ollama, Open WebUI, Hermes, Ask (Q&A over my homelab knowledge vault), Wiki, Media, Tailscale status, an embedded terminal, and Settings.
Architecture decisions
State management: Riverpod 3 with code generation
Every provider in this app uses @riverpod code generation:
@riverpod
Future<List<PveNode>> nodes(Ref ref) async {
  final api = ref.read(proxmoxApiProvider);
  return api.getNodes();
}
This gives you:
- Auto-generated
nodesProviderwith proper dispose/cancel behavior .valuefor the successful state (not.valueOrNull— use.valuein Riverpod 3)keepAlive: truefor providers that should outlive their widget (navigation history, cluster stats)
Riverpod 3 changed the generated signature — providers now receive Ref (not AutoDisposeRef or specific typed refs). If you see type errors after upgrading, update any manual provider overrides to accept Ref.
HTTP client: Dio with self-signed SSL bypass
The Proxmox API uses a self-signed certificate. Configure Dio to trust it for known IP ranges:
final dio = Dio();
(dio.httpClientAdapter as IOHttpClientAdapter).createHttpClient = () {
  return HttpClient()
    ..badCertificateCallback = (cert, host, port) =>
        host.startsWith('10.0.0.');
};
Never return true unconditionally — scope it to your known lab IP range.
Data models: freezed + json_serializable
Each Proxmox API response maps to a freezed model:
@freezed
abstract class PveNode with _$PveNode {
  const factory PveNode({
    required String node,
    required String status,
    @JsonKey(name: 'maxcpu') required int maxCpu,
    @JsonKey(name: 'maxmem') required int maxMem,
    @JsonKey(name: 'mem') required int usedMem,
    @JsonKey(name: 'cpu') required double cpuUsage,
  }) = _PveNode;
  factory PveNode.fromJson(Map<String, dynamic> json) => _$PveNodeFromJson(json);
}
Run dart run build_runner build --delete-conflicting-outputs after any model change.
Task 1: Set up the Flutter project
flutter create myofficelab_app \
--org com.myofficelab \
--platforms linux,ios \
--description "MyOfficeLab homelab control panel"
Key packages:
dependencies:
  flutter_riverpod: ^3.0.0
  riverpod_annotation: ^3.0.0
  freezed_annotation: ^3.0.0
  json_annotation: ^4.9.0
  dio: ^5.0.0
  flutter_secure_storage: ^9.0.0
  fl_chart: ^0.68.0
  percent_indicator: ^4.2.3

dev_dependencies:
  riverpod_generator: ^3.0.0
  freezed: ^3.0.0
build_runner: ^2.4.0webview_flutter has no Linux support. Use webview_cef instead:
dependencies:
  webview_cef: ^0.5.1
Add the required CEF hooks to linux/runner/main.cc before any other Flutter initialization:
#include "webview_cef/webview_cef_plugin.h"

int main(int argc, char** argv) {
  // CEF sub-processes exit here before Flutter initializes
  initCEFProcesses(argc, argv);

  // ... rest of Flutter main
}webview_cef downloads the Chromium Embedded Framework (~3.1 GB extracted) on the first flutter build linux. This is a one-time download but requires a fast internet connection. Subsequent builds are instant.
Task 2: Build the Proxmox API client
The Proxmox API uses a custom Authorization header format:
class ProxmoxApi {
  final Dio _dio;

  ProxmoxApi(String host, String tokenId, String tokenSecret) :
    _dio = _buildDio(host, tokenId, tokenSecret);

  static Dio _buildDio(String host, String tokenId, String tokenSecret) {
    final dio = Dio(BaseOptions(
      baseUrl: 'https://$host:8006/api2/json',
      headers: {
        'Authorization': 'PVEAPIToken=$tokenId=$tokenSecret',
      },
      connectTimeout: const Duration(seconds: 10),
    ));
    // Trust self-signed certs for known lab IPs
    (dio.httpClientAdapter as IOHttpClientAdapter).createHttpClient = () =>
      HttpClient()..badCertificateCallback =
        (cert, host, port) => host.startsWith('10.0.0.');
    return dio;
  }

  Future<List<PveNode>> getNodes() async {
    final r = await _dio.get('/nodes');
    return (r.data['data'] as List)
      .map((n) => PveNode.fromJson(n as Map<String, dynamic>))
      .toList();
  }
}
Task 3: Build the dashboard screen
The dashboard sparkline samples cluster CPU average every time the nodesProvider auto-refreshes. Use a keepAlive provider so the history accumulates across tab navigations:
@Riverpod(keepAlive: true)
class ClusterCpuHistory extends _$ClusterCpuHistory {
  @override
  List<double> build() {
    ref.listen(nodesProvider, (prev, next) {
      next.whenData((nodes) {
        final avg = nodes.isEmpty ? 0.0
          : nodes.map((n) => n.cpuUsage).reduce((a, b) => a + b) / nodes.length;
        state = [...state.takeLast(29), avg * 100];
      });
    });
    return [];
  }
}
Plot with fl_chart’s LineChart, but never wrap fl_chart in IntrinsicHeight — it doesn’t implement intrinsic sizing and will throw at runtime. Use a plain Row with CrossAxisAlignment.start instead.
Key design decisions and gotchas
These are the things that cost real debugging time — the details that don’t show up in any package README but will bite you in exactly the same way they bit me.
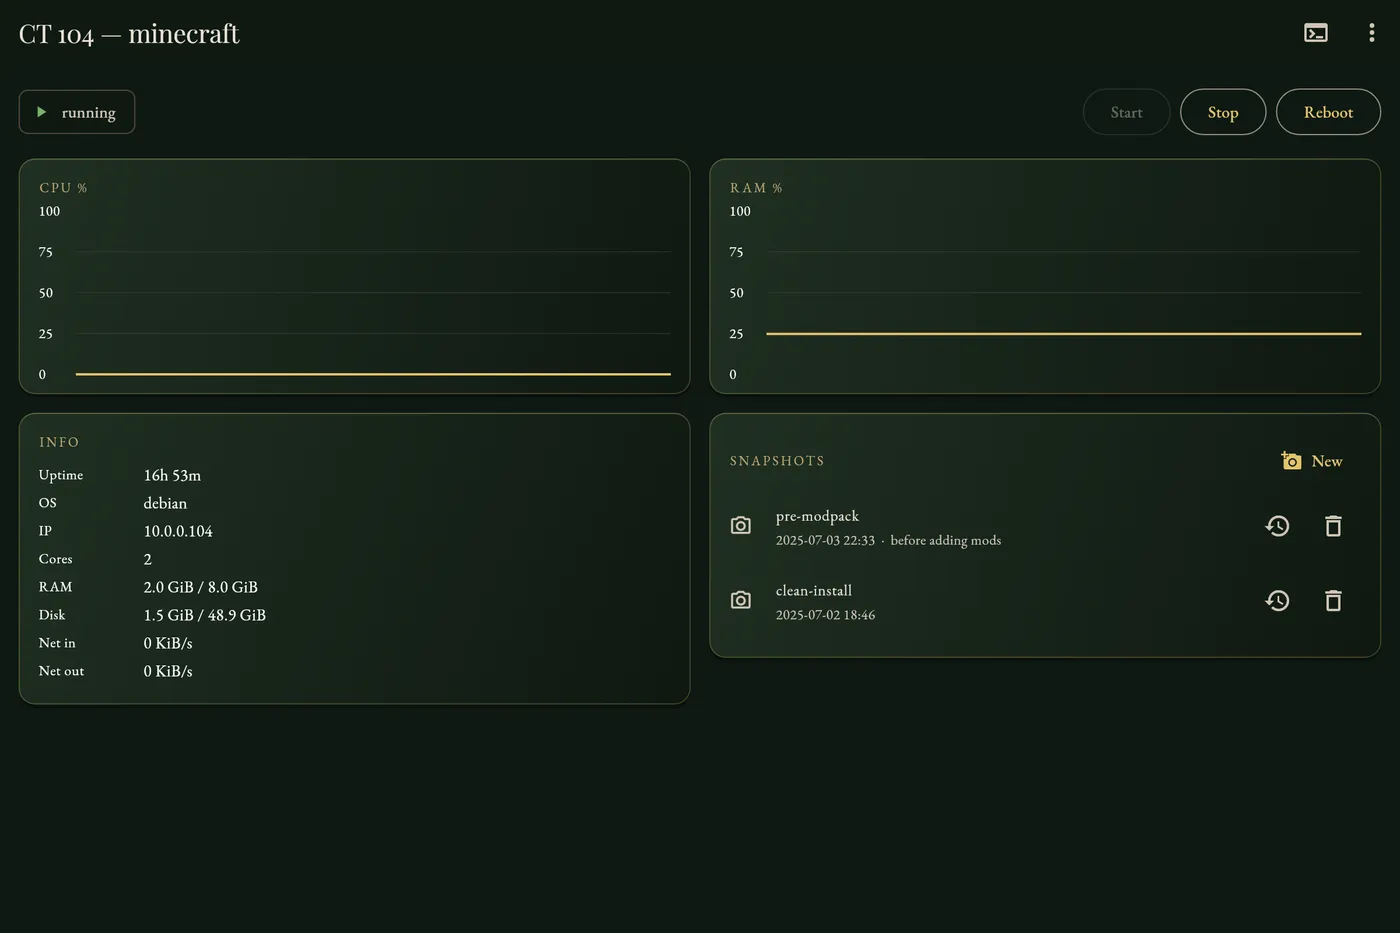
The design system: This has been through three full identities — flat Material, a cyberpunk neon phase with animated ambient orbs, and now a brass-instrument look: engraved panels, radial gauges on dark instrument faces, and two fully authored palettes (deep dark and parchment light) that are never interpolated. The lesson from re-theming ~700 color usages twice: resolve every color through one theme object from day one, because “I’ll just hardcode this hex” compounds into a week of migration later.
CEF webview crash fix: webview_cef 0.5.1 has a bug where injectUserScripts is declared as Map<int, InjectUserScripts?> but initialized with <int, InjectUserScripts>{} (non-nullable). The null check throws when any webview opens. Fix: always pass injectUserScripts: InjectUserScripts() when creating a webview.
AppImage deployment: Building a self-contained Linux AppImage requires bundling libgthread-2.0.so.0 — Debian links to it, but openSUSE Tumbleweed (the target) dropped it. The AppImage build script detects and bundles the missing lib into usr/bin/lib/.
Keyring resilience: flutter_secure_storage on Linux stores all settings as one libsecret item. If the GNOME login keyring is locked (session just started, daemon restart), the app drops to the first-launch gate — even if data is there. The fix is detecting KeyringLocked and showing an unlock prompt rather than treating it as empty.
Running the Linux build
flutter run -d linux
flutter build linux --release
# Bundle as AppImage (after release build)
bash tool/build_appimage.sh
# → /root/HomeLab-x86_64.AppImage
rsync -av --progress /root/HomeLab-x86_64.AppImage user@elitebook:~/Applications/
# Then: chmod +x ~/Applications/HomeLab-x86_64.AppImage
# Create .desktop launcher for taskbar integration
The Flutter app is available for download as an AppImage (Linux x86_64) — see the About page for the link. Source code will be on GitHub once I’ve set up Codemagic for iOS builds.
Related posts:
- Building a 4-Node Proxmox Cluster on HP EliteDesk Mini PCs — the cluster this dashboard manages
- Proxmox Monitoring with Prometheus and Grafana — the observability stack embedded as a webview tab
- Running Ollama on a 3-Node Proxmox LXC Cluster — the AI inference backend accessible from the Ollama tab
- Hermes Agent Setup: Self-Hosted AI Agent on Proxmox — the agent tab for delegating lab tasks
- Tailscale Subnet Router: Remote Access to Your Entire Homelab — how the app reaches the cluster from outside the LAN
- RAG for Your Homelab Wiki: Answers That Cite Their Source — the endpoint behind the app’s Ask tab and its citation chips
Comments
Comments are powered by GitHub Discussions — sign in with a GitHub account to join the conversation.